In this assignment, we were given the task of capturing motion using much different technique's. Panning, Blur to Stop Motion, Exaggerated Movement and Stopping Motion. Capturing movement in images is something we don't see in most pictures being published, we don't see a part of the image before or after it was taken. I learned that with such little or exaggerated movement can change the perspective of the image. Each of these images came more alive and added a sense of dimension compared to images that we normally shoot. Throughout this assignment, we had to take notice of these camera's settings, shutter speed, f-stop, and iso. Every time we took a picture we had to continually change the settings based on the lighting and how we wanted the motion to be captured. we also were fortunate enough to be provided tripods for a better stable and secure platform. The tripod reduced any shakiness that our hands will cause.
This image is an example of a Blur To Show Image. In this image, we were challenged to show the movement of the image within one shot. In this shot the main focal point is still in focus; the hand while the background is blurred and lit up with a tungsten light mimicking the movement of the photo. This shot was very tricky to shoot, I myself wasn't comfortable with this kind of shots. The setting of this shot varied on what type of blur of the movement you want to show. For a sharper image, the aperture of the shot should be a wider hole (higher f-stop number). Limiting the amount of light being let in causing it to blur the background while still in focus with the subject. In this photo, a slow shutter speed was also essential to get this type of result.
This imaged is an example of a Stop Motion image. This image was really exciting and fun for me, we were given a large range of options to capture this image. This kind of image capture a moment of time when the ball midair seemed to be floating after being thrown up. I was more comfortable with this type of image, for I learned and shot similar photos like these from shooting sports recently. For this picture, it was necessary to change your camera's setting to shooting multiple frames continuously to capture images similar to this. It was also necessary that you have a fast shutter speed.
This picture of my lovely friend Maegan playing with a hula hoop and is an example of an Exaggerated Movement. This type of image portrayed expressions through actions made by the subject. Examples of Exaggerated Movement can be expressed and shown in many different ways. The actions in the photo set the feeling an ambiance of the image. This image was easier to shoot than the other ones. We did not have to as much change the settings regularly. Although this image needed the camera to be set to shoot multiple frames to capture moments like this.
These pictures of a snowman walking in front of a christmas treee is an example of Panning.
A focused subject and a blurred backround is a necessity to be able to complete a shot similar to this. It took many attemts to capture this pictures, attemps like getting my hamster to be my subject. Most of the photos i took were either too blury or the subject wasnt focused at all. The subject can go in many diffirent speed and your camera should be able to go with it. Examples of shots you will usually see is with Racecar photographers who capture beast machines going hundeds of miles per hour. It was necessary to use a good stable platform and for you to be able to move the camera quicklu along with it.
This assignment tested our abilities on tuning and tweaking our settings to capture motion in different types of shots. Panning, Stopping Motion, Exaggerated Motion, and Blur to show Motion are the types of shots assigned to us. Each of these shots required quite a bit of tuning and creativity of the composer. We as a group had some complications, in the beginning, manipulating our settings according to the type of shot and as we progressed we had an idea on the settings required for the various shots.

This type of shot is referred to as Panning. Panning focuses on a moving target and creates that as the focal point and makes the background out of focus. It requires vigorous movement varying on the speed of the moving target. This shot focuses on the shirt of the model and blurs out the background though showing the motion in which the camera moved to capture the moving target. The optimal shutter speed for panning is varied on the speed of the moving target, if your target is fairly slow you may use a low shutter and if your target is very fast it`ll require a fast shutter speed.
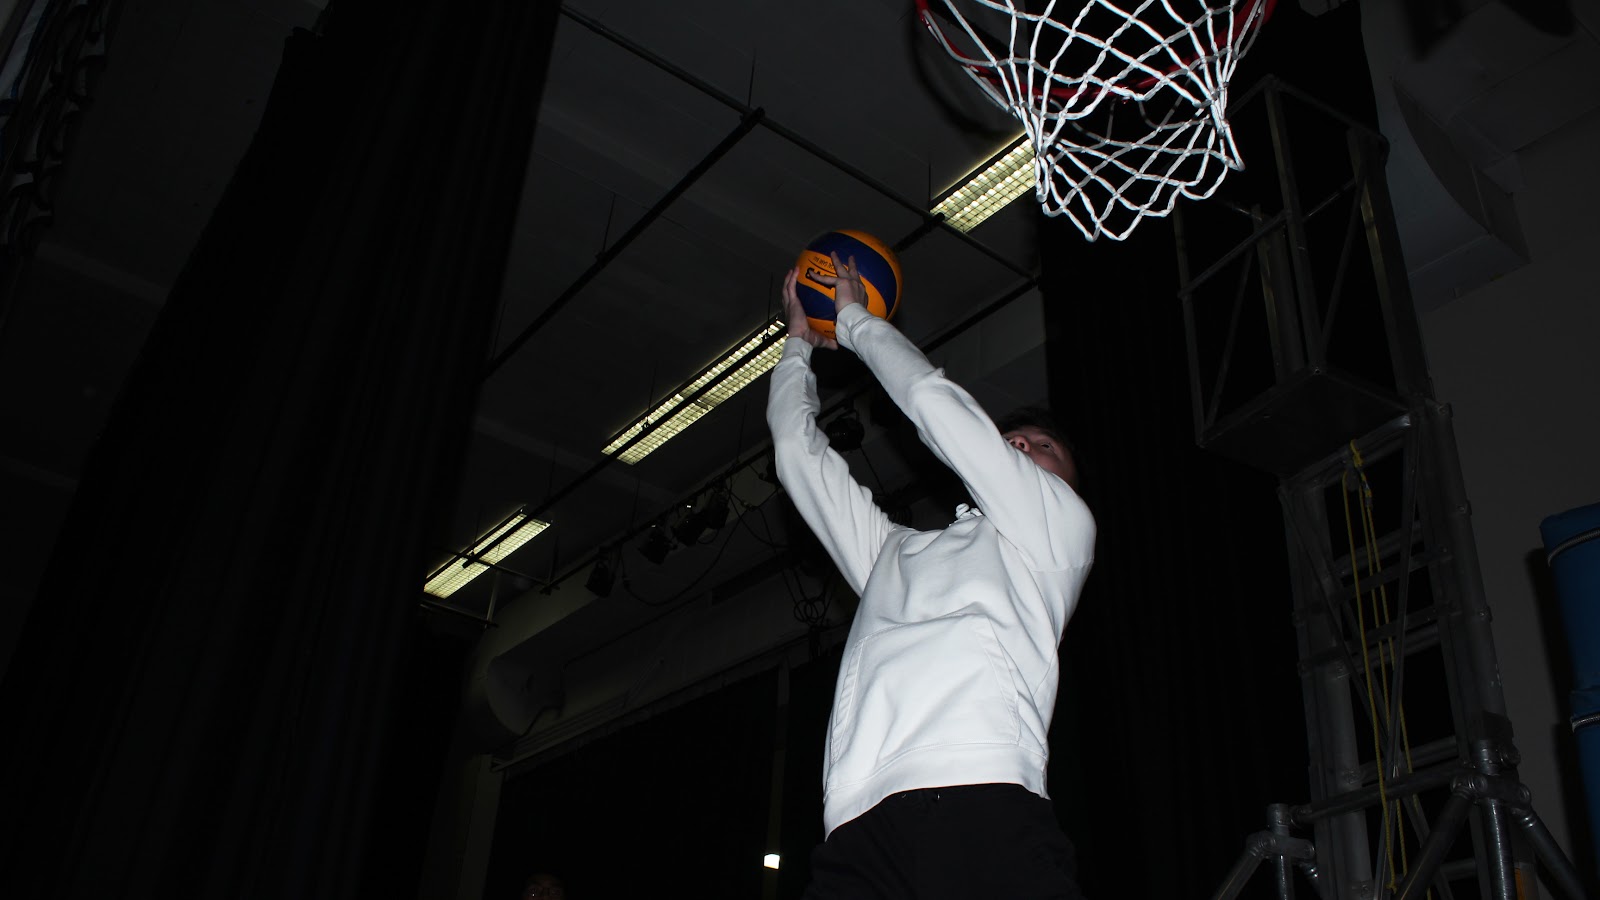
This type of shot is referred to as Stop Motion. Stop Motion is where a moment of motion is frozen and captured. As you can see the model in the picture is captured in the air right before finishing the dunk. Tips you can use to take a stop motion is you can have flash which is optional, you can also use a tripod, but most importantly having a very high shutter-speed would be optimal to taking stop motion.
This shot is called a Blur to show Motion shot. Blur to show Motion is self-explanatory according to the name its self. In this picture, the two models are seen while another model is running around them shown by the trail of a white blur. An optimal shutter speed for taking this type of shot is having a low shutter-speed and using a tripod to keep the background in focus while the moving subjects can be distinguished in the picture.
For this GCT assignment we had to showcase movement in our photos. We shot all of our photos in manual mode and manipulated the settings based on lighting and what kind of shot we wanted to take. There are several different techniques to show motion in a photo. These ways include, exaggerated movement, panning, stop motion, and blur to show motion. Sometimes, there is a need to blur certain elements in the image while focusing sharply on a few subjects in the foreground. Other times, you may want to freeze or blur everything. The direction you take depends on what kind of shot you are trying to get. The shutter speed that you use while taking pictures plays a key role in capturing motion in your image. The faster the shutter speed, the sharper the focus on your subject and with slower shutter speed you can blur the subject.

One of the ways to showcase movement in your photos is by having your subject or object in your photo blurred. To accomplish the type of picture you must have a lower shutter speed, it is also ideal to use a tripod so that there isn't any unintentional blur in your image. In this image we have "Waldo" opening and closing the locker to show movement in the door and arm. The challenging part of this photo was getting the timing right and finding the shutter speed that gave us the best picture we could get.

Another way I showcased movement in this assignment was with panning. This technique has your subject sharp in focus while the background is blurred. Like the first technique, when trying to capture this type of photo you will need to use a lower shutter speed. However, you do not need a tripod for this type of picture, instead you will be panning your camera along with the path of your subject. Panning was probably the most difficult for me and it took awhile to achieve but learning to get this type of shot really enhanced my photography skills. The challenge in taking this type of photography is moving the camera along the same path, at the same speed as the subject of the photo. This photo took a lot longer to get and there was a lot of trial and error but we eventually ended up with a few nice shots.

Stop action is another great way to show movement in your photos. This technique is when you have everything in your photo completely in focus. To achieve this type of photograph you will need to use a faster shutter speed. The faster the shutter speed, the more frozen and crisply-defined your subject will be, which is what you want when taking stop action photos. When taking stop motion pictures it is ideal to have your subject exaggerate their movement or to have some element in your photo capturing the movement like a trail of snow or a splash of water. In this photo we have Yana hula hooping, we set our shutter speed to 1/500 and used flash to capture this photo. This technique was quite easy once we figured out how to manipulate our camera settings.
When showing movement in photographs you can have your subject exaggerate their movement to more enhance your picture. In this picture Yana is exaggerating her dance moves to show movement in the photo. When taking this type of photography you want your audience to be able to feel the movement through the screen. This technique was probably the easiest to achieve because I was familiar with this technique from taking pictures at games.
This photograph is categorized as stop to blur motion, the particularly interesting concept of this is, you have a focal point and the audience should see that the most, for instance this was the volleyball it was blurred but everything in the background was not. To capture this, often the object you want blurred should be in a action whether its riding a bike, throwing a ball, any physical movement and a still background can show this. The optimal settings were fairly similar to the first one , a high ISO helps in this situation to reduce the amount of light yet, being able to make fast pictures.

This assignment was all about motion and how we can manipulate it, the task was to take pictures accordingly by stopping motion, exaggerating motion, blur to show motion, and panning. At the start figuring the ideal settings were complex but after many trials and errors it was simpler. The image shown above is caught by stopping motion as I jumped in the air and set the ball the camera was taken at the a time I was above ground, to portray that I jumped. The reason this would not be considered a exaggerated motion is because the action was not overly excessive or over the top.
This in my opinion would be an easier shot to get then some of the others do to the basic settings available it is optimal to shoot at a high ISO we found it worked best.
This photo was Chris, running with a basketball to make a lay up, it was a panning shot, as the approached and started moving the photographer held his shoot button, and followed the model.
This allow the figure to be in complete focus while having a blurred background showing a running movement. To create this, we found that the shutter speed worked best just below the middle point and the others settings kept lower to reduce the amount of light given.
The last photo, as you can see is me crazily whipping hula hoops, this is an exaggerated motion the model over does an action to show immense blur and motion I grabbed 4 hula hoops each with different colour and twirled them wildly in my hands. The camera does not much have affect on this as comparison to panning, but the model is the key aspect he/she should create an action with something that may stand out and do it to the point that it looks weird. The suitable settings for this would be a high ISO,a higher f-stop, and a higher shutter speed.
My Favorite Motion Photo
Panning:
Something I learned when panning is that the subject and the camera must be moving in coordination or moving at speed where its not too fast or not too slow. I also learned that using slow shutter speeds is not very good for panning as the subject would be blurry and in panning, you want to keep the subject as sharp as you can and the background blurry. When trying to pan, a good shutter speed for slow moving subjects would be around 1/60 but for fast moving subjects, the shutter speed would have to be around 1/125. While taking continuous shots, you should also have a swift left to right or right to left movement. There are other ways you can move the camera but those are those most common movements.
Exaggerated motion and stopping motion:
These are my favorite ones because they are very alike and the camera settings needed for these pictures are not very hard to adjust and find out. For stopping motion I had to play around with a lot of shutter speeds but I found out that fast shutter speeds such as 1/250 really capture the motion and make the picture look very sharp and crisp. You can also add a flash to make the picture look sharper. It really depends on the how fast the action you are doing is.That is when you have to adjust the shutter speed to that speed of action.
Capturing Blur in motion:
The biggest thing I learned about capturing blur in motion is that you need to slow down your shutter speed. The reason for movement blur is simply that the amount of time that the shutter of a camera is open is long enough to allow your camera's image sensor to see the movement of your subject. So basically, to capture movement blur in an image, you need to select a longer shutter speed.


