Showing posts with label Chris. Show all posts

Dolch Sight Words by Chris, Cielo, Frans, Sarah


We, as a group, were assigned to take pictures of specific sight words. In the start we decided to split the 95 sight words into 4 since there were 4 of us in the group. There were many challenging words to do such as party, robin, squirrel, game, and many more. Some of us went to places such as grocery stores and museums to find specific words. In the span of about 3 weeks, we manage to collect all the sight words and the end product was worth it.

Macro Photography By: Chris


This assignment is called Macro Photography. It gave us an opportunity to take pictures of subjects, figures, actions, at a closer view capturing its fine textures. We as a class were required to use manual focus for our camera’s auto focus was not designated to be used for this style of photography. Doing this assignment opened up my eyes to a whole new perspective of photography. I learned that there can be a beauty in something small or enlarged, or even both. I really enjoyed this assignment for I have already been doing this type of photography at a young age before even knowing how to use a camera to its full potential. If I were asked to do this assignment again I’d definitely do it and create more variety in pictures.


Alphabet Assignment By: Chris


This assignment we were required to take pictures of figures, shapes, structures, and other things that look like a letter from the alphabet. Easier said then done. It was very time consuming in my opinion, because I wasn't able to find things that look like letters.  We are also required to have creativity and being more open to an idea such as a letter looking like something. In my experience, it required me to look beyond things for what they were and make out letters. I didn't realize how many everyday structures, objects, and other things can look like letters. They turned out great in my opinion, and worth the time I spent. I definetly enjoyed this assignment, and I assume others did aswell.


Final Double Exposure By: Chris


This assignment was called Double Exposure. It tested our abilities in photography and editing on photoshop. It required us to know how to use photoshop and use that to our creativity in creating an image. Double Exposure is the corresponding mean in respect of two images, may or may not be identical to each other. As shown above, it has me embedded in another picture which is a playground. I chose this as my background first because it reminds me of when I used to play on them. It also included the bright colours of which seems to be near the warmer times which, no one can deny we all love. In addition to colours, it also has colours of Sargent Park, the school that I attend and take pride in. I also particularly included the small portion of the alphabet because further continuation of when I was a child. Furthermore, I really enjoyed the process in making these Double Exposure portraits and really gave me a headsup that there are more aspects of photography I need to learn. Creating these portraits, and seeing them come together was very exciting, and would definetly do this again.


Shots And Angles Video Edition By:Chris


This post will include many assignments, including shots and angles the video edition, my storyboard, as well as my video following the storyboard. We were assigned to create a slide knowing the learning the terminology of shots and angles in the video form. Simultaneously, we were also assigned to create a slide a corresponding slide, to our 1 minute tutorial video. I chose "how to make nutella toast". I was also required to learn the adobe program in order to create my video. Having knowledge of how to use the program I was able to create this assignment to the best of my ability. I was told to incorporate certain types of shots to be successful in this project. After having a certain amount of time, I completed having a confident feeling in my work.  


Chris's Portrait Post

 
This assignment was quick and required less amount of time than normal assignments. This led to some missing quality. It required us to take pictures at four different stations where one's station had natural lighting, and two of them had a good amount of natural light, and one required the use of artificial light. Each station had a different lens and required a little bit of tinkering to take a good portrait. We took these portraits that were decent though the main purpose was that we analyze and study our mistakes so that we can take great portraits later on.


10 Steps to Creating a Good Portrait:

1. Frame your shot so that the subject takes most of the picture. Doing this will allow for less distraction on more focus on the subject.

2. Try using the Rule of Thirds. Doing this require to place your subject in one of the four intersecting lines or "sweet spots" and these spots are what our eyes are drawn to.

3. The depth of field. As your object being the most important thing, you want to keep your subject in focus so that the "ground" does not take away from your subject.

4. Taking back the saturation of the picture (making it black and white) can give your portrait a creative look.

5. Taking your time. If you are trying to get a natural portrait, take your time and take multiple shots, this gives you a higher chance of getting great portraits.

6. Decide on what your image you are trying to portray, this saves time for other options.

7. Using Reflections. The use of reflections creates an interesting and creative portrait.

8. Adding shadow. This gives the viewers more interest into the picture.

9.Playing with your light. This will create certain effects depending on how it is used.

10.Using props. The use of props will create contrasts of interest within the picture.


Photographic Composition Post By: Chris

As a learner in photography, I've come across that composition really meets the higher level of art and photography. Composition is an arrangement or a picture composed of visual elements of objects in a work of art. As a class we were assigned to take photos according to the 3-9 visual composition elements.This assignment required me to take a step back and look at the bigger picture differently


Photographing Motion By: Chris

 
This assignment tested our abilities on tuning and tweaking our settings to capture motion in different types of shots. Panning, Stopping Motion, Exaggerated Motion, and Blur to show Motion are the types of shots assigned to us. Each of these shots required quite a bit of tuning and creativity of the composer. We as a group had some complications, in the beginning, manipulating our settings according to the type of shot and as we progressed we had an idea on the settings required for the various shots. 

 
This type of shot is referred to as Panning. Panning focuses on a moving target and creates that as the focal point and makes the background out of focus. It requires vigorous movement varying on the speed of the moving target. This shot focuses on the shirt of the model and blurs out the background though showing the motion in which the camera moved to capture the moving target. The optimal shutter speed for panning is varied on the speed of the moving target, if your target is fairly slow you may use a low shutter and if your target is very fast it`ll require a fast shutter speed.
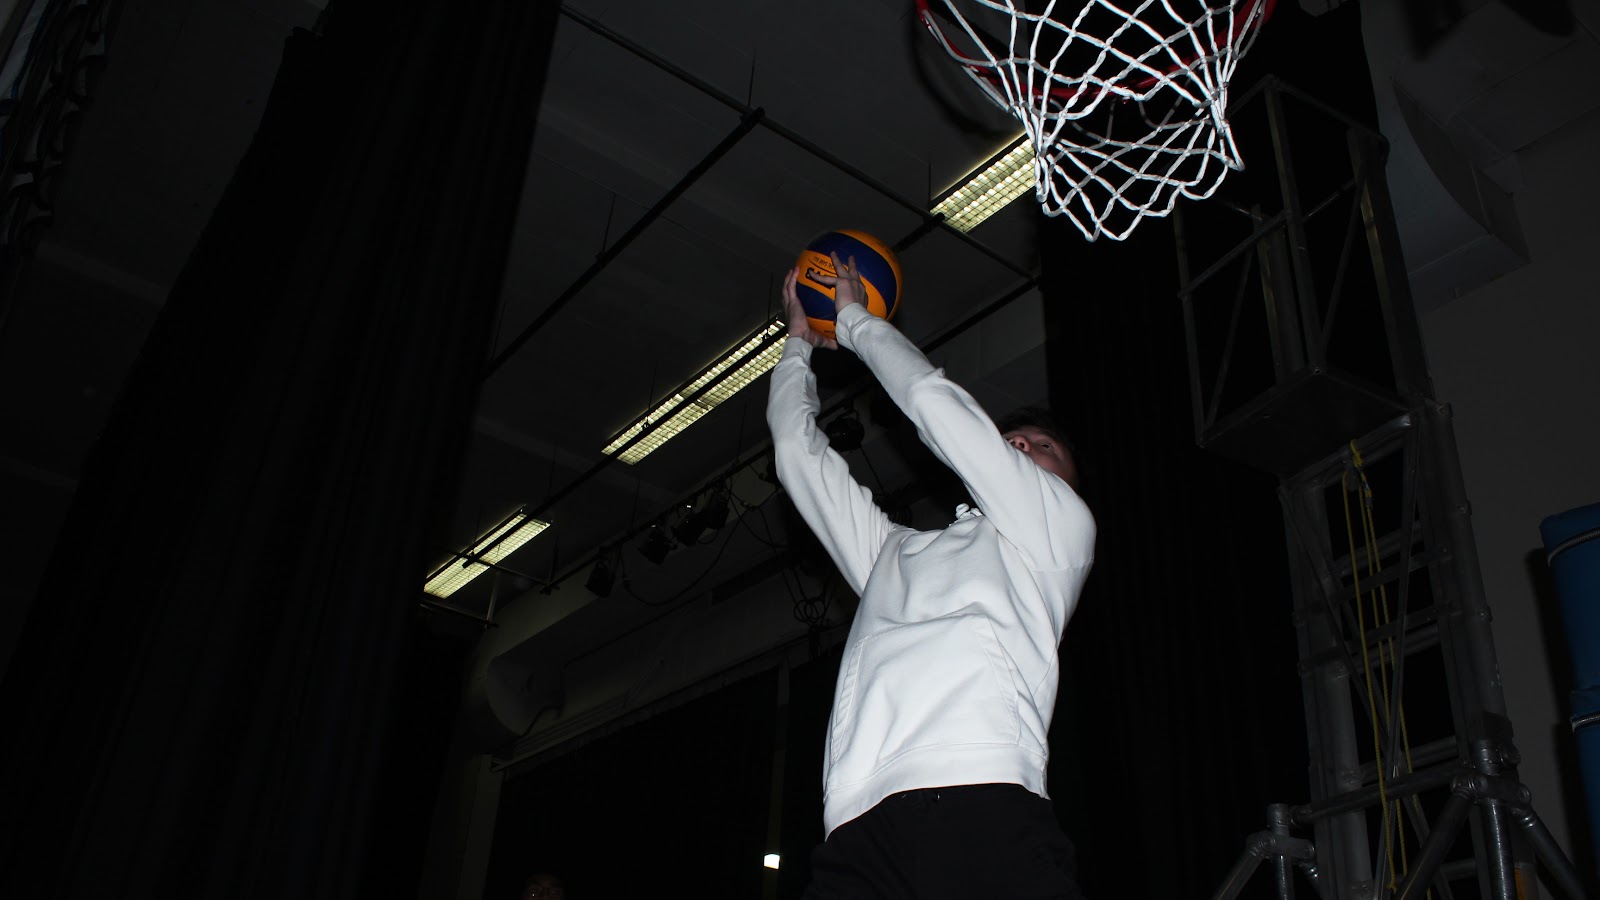
 
This type of shot is referred to as Stop Motion. Stop Motion is where a moment of motion is frozen and captured. As you can see the model in the picture is captured in the air right before finishing the dunk. Tips you can use to take a stop motion is you can have flash which is optional, you can also use a tripod, but most importantly having a very high shutter-speed would be optimal to taking stop motion.
 
This shot is called a Blur to show Motion shot. Blur to show Motion is self-explanatory according to the name its self. In this picture, the two models are seen while another model is running around them shown by the trail of a white blur. An optimal shutter speed for taking this type of shot is having a low shutter-speed and using a tripod to keep the background in focus while the moving subjects can be distinguished in the picture.


An Egg Using Manual Settings By: Chris


For this assignment, we were given plastic eggs to take photographs of in a couple different environments. Our task was to succeed in the use of Manual mode to the best of our abilities. This required the analyzation of your lighting condition and the toning your ISO, F-stop, and your shutter speed. This was not easy considering that not all environments had lighting that was cooperative with the camera, but we had fiddled and worked with the camera to understand the use of each setting. Though I'd like to say that this assignment gave me a better understanding of how to work with my camera and the specific settings on it.


Hidden Places at Sargent Park By Chris

This is the big tree growing over the fence into Sargent Park grounds.It's leaves have changed color due to the weather and some of the leaves have fallen to be come foliage.It can be located near the parking lot fence and the soccer field goal.This tree covers a large area and provides shade during the summer.Sooner or later the leaves on the branches will fall and will be covered in snow.


Chris's Shots and Angles

Welcome World, Here is my first GCT assignment on Shots and Angles